Mubasheera PullatOct. 9, 2024
The Time Off module in Odoo, also referred to as Leave Management, is a robust tool designed to streamline the management of employee leave requests, ensuring compliance with company policies while enhancing overall HR efficiency. It allows organizations to define various leave types, such as vacation, sick leave, parental leave, and more, each with customizable rules governing accrual, eligibility, and duration. For instance, businesses can establish specific accrual policies based on factors like tenure, hours worked, or fiscal periods, making it easier to manage how employees earn their leave.
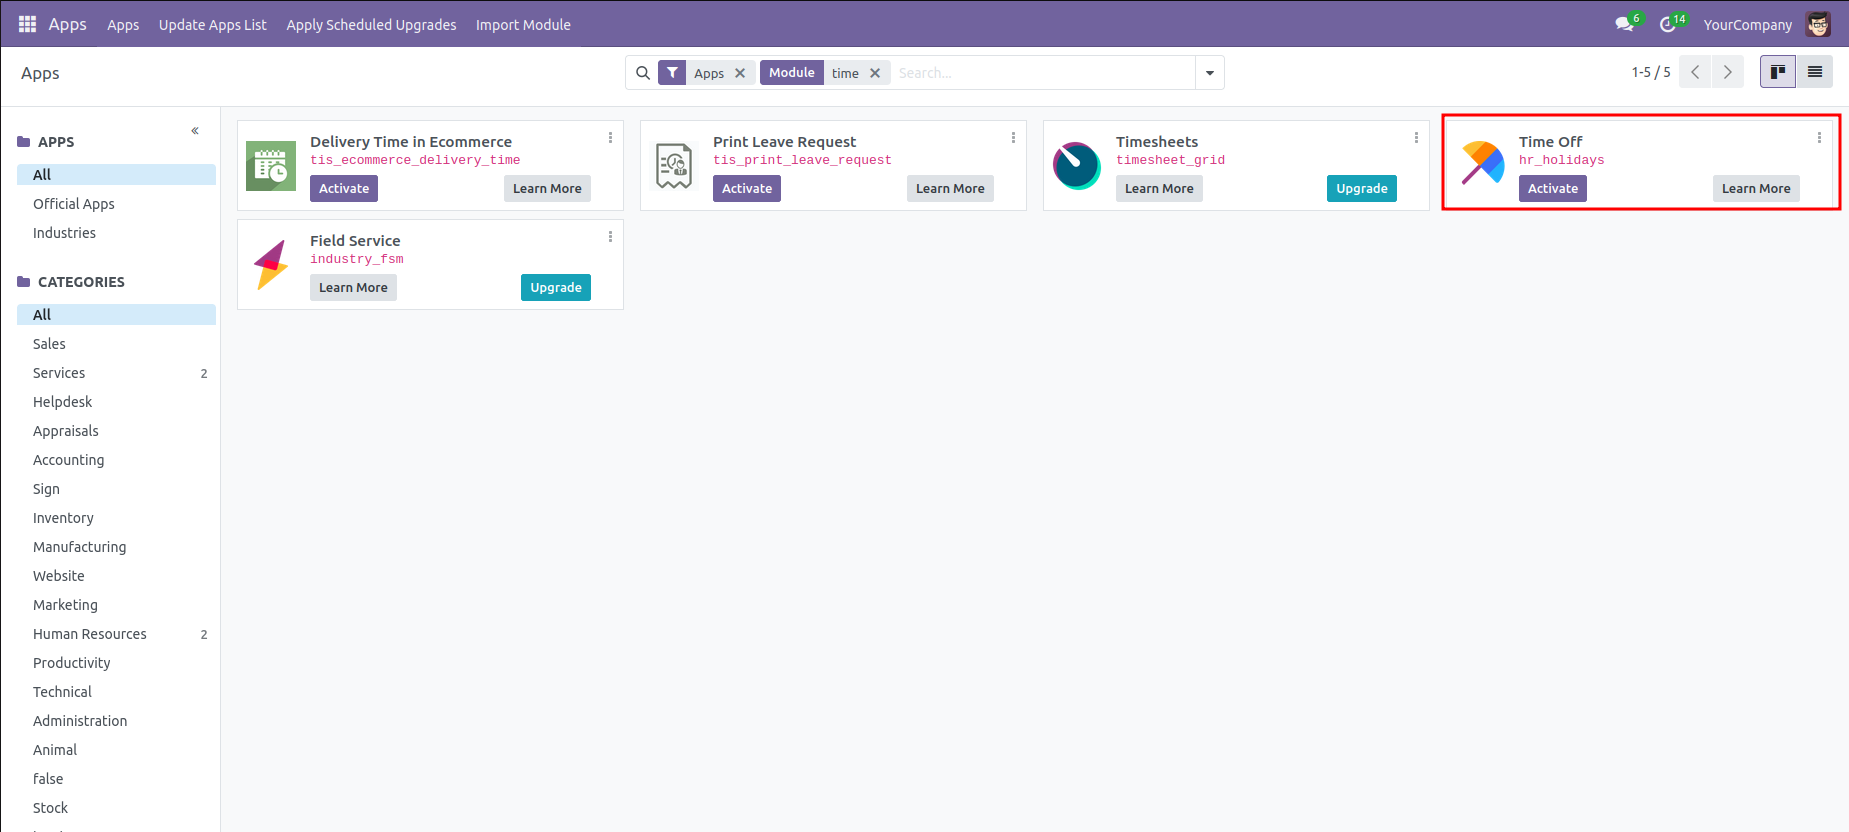
To set up the Time Off module in Odoo, begin by logging into your Odoo instance with administrative credentials. Navigate to the Apps menu and search for "Time Off" or "Leave Management." Once you locate the module, click the Install button to add it to your system.
Dashboard
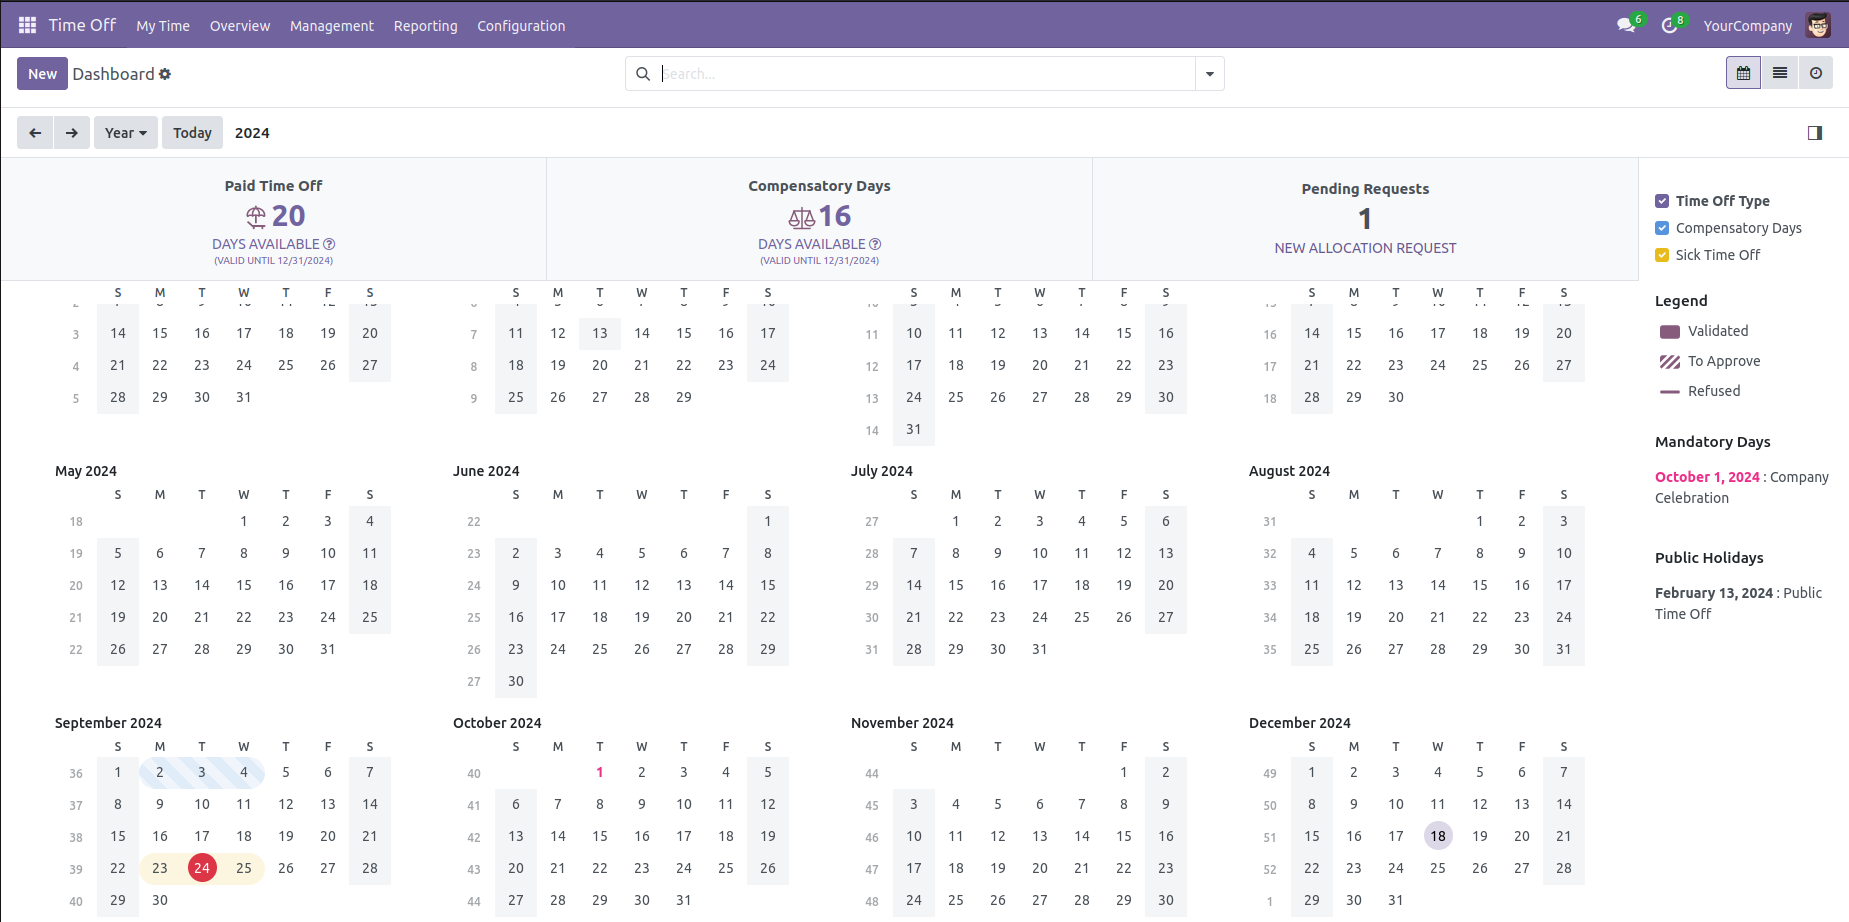
In Odoo 18, the Time Off Dashboard provides an easy way for employees and managers to manage and track leave requests. Employees can view their available leave balance, submit time off requests, and track the status of their requests. Managers can review and approve or reject time off requests from their team. The dashboard gives a clear overview of leave data, making it simple to manage time off efficiently.
Time Off Types
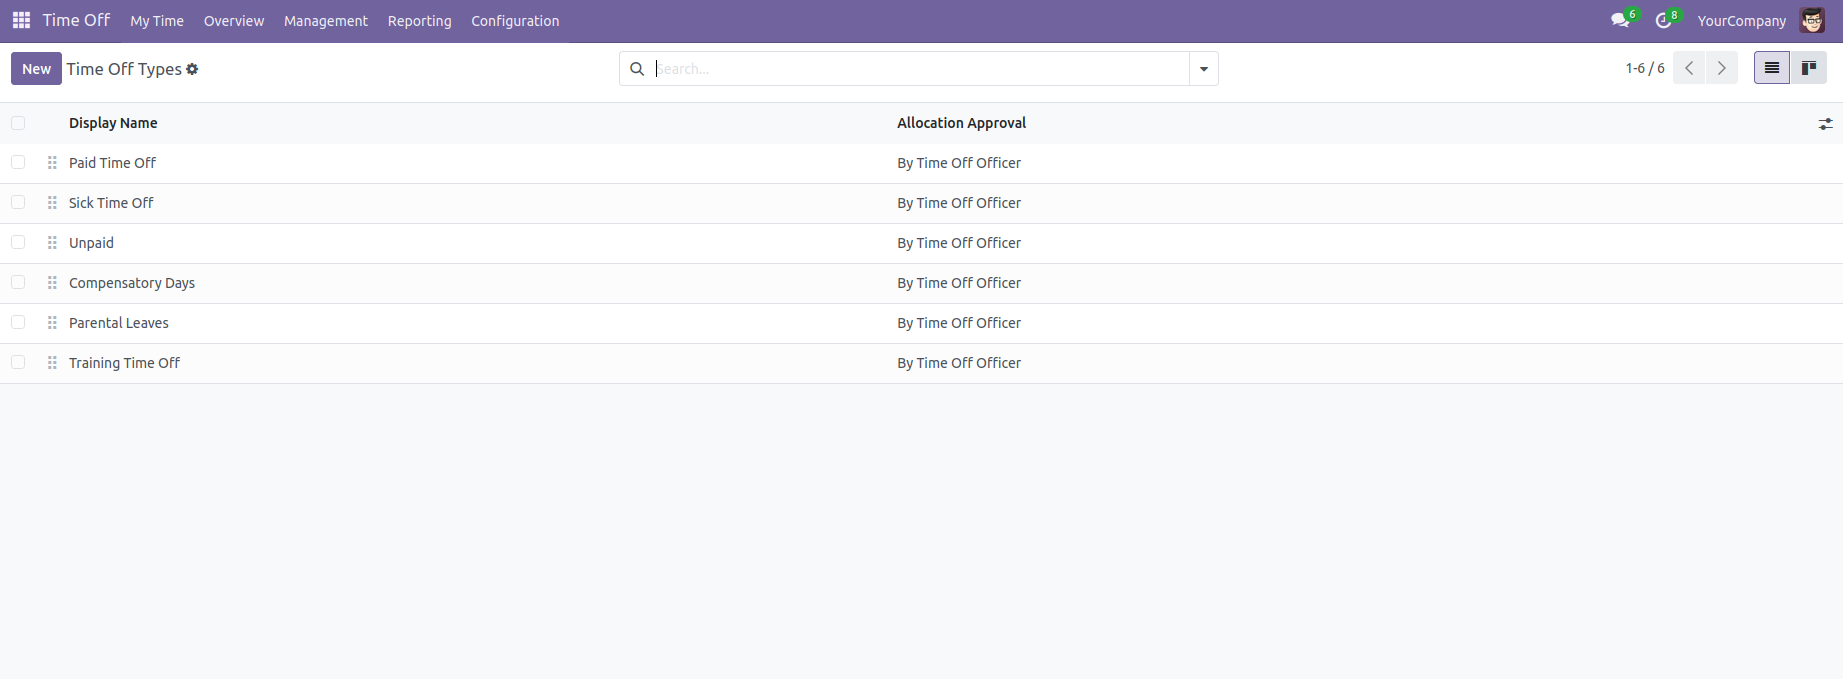
Adding a new leave type, such as vacation, sick leave, or special leave, is a simple process to help manage different categories of employee time off. Go to the Configuration menu and select Time Off Types. This section allows you to manage existing leave types and create new ones. By clicking on the Create button, you can enter details such as the leave type's name, approval process, and allocation method. Once saved, the new leave type will be available for employees to select when submitting time off requests, ensuring an organized and efficient leave management system.
When creating a new Time Off Type in Odoo, several fields need to be configured to properly define the leave type. Here's a description of the key fields available when setting up a new Time Off Type:
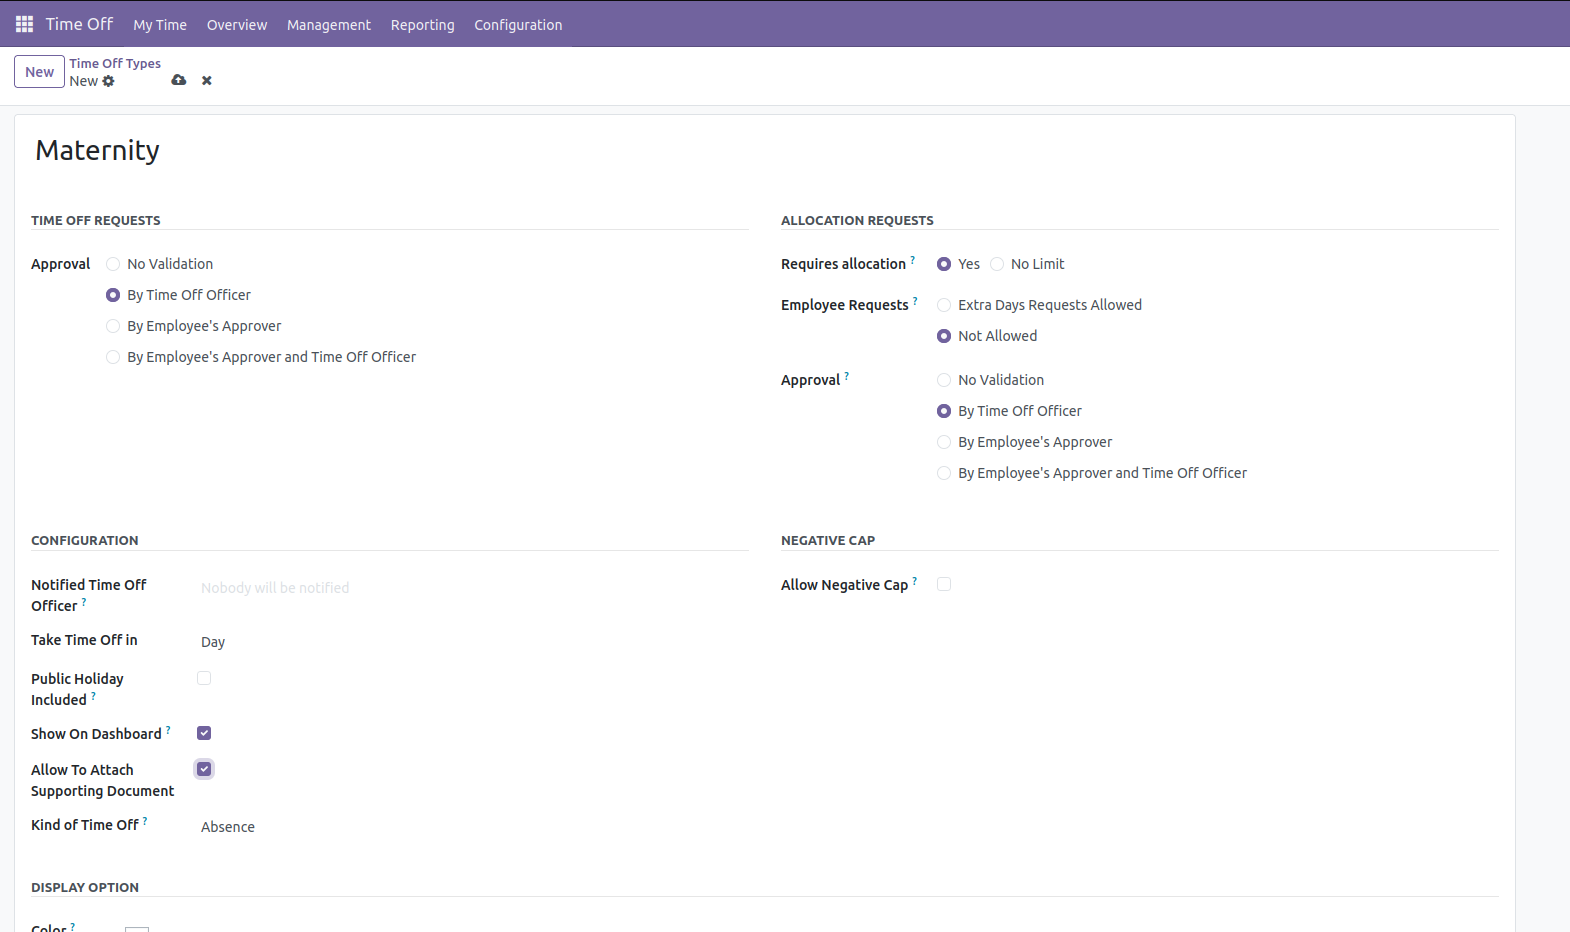
Time Off Requests Section:
Name: The name of the leave type, such as "Vacation," "Sick Leave," or "Maternity Leave." This is the label employees will see when selecting a leave type.
Approval: Specifies the approval process for leave requests.
No Validation: No approval required.
By Time Off Officer: Leave requests must be approved by the designated time off officer.
By Employee's Approver: The employee’s direct manager must approve the request.
By Employee’s Approver and Time Off Officer: Requires dual approval from both the employee's approver and the time off officer.
Allocation Requests Section
Requires Allocation: Defines if allocation of leave is necessary before submitting time off requests.
Yes: Allocation is required.
No Limit: There is no limit on leave allocation.
Employee Requests: Determines whether employees can request extra leave days.
Extra Days Requests Allowed: Employees can request more days than allocated.
Not Allowed: Extra days cannot be requested.
Approval (For Allocation Requests): Specifies the approval process for allocation requests.
No Validation: No approval needed for allocation requests.
By Time Off Officer: The time off officer must approve allocation requests.
By Employee’s Approver: The employee’s direct manager must approve allocation requests.
By Employee’s Approver and Time Off Officer: Dual approval is required.
Configuration Section:
Notified Time Off Officer: Displays who will be notified when time off requests are submitted. In the image, it states "Nobody will be notified."
Take Time Off in: Defines the unit in which time off is requested.
Day: Time off is requested in days.
Hour: (Not shown in image, but could be selected) Requests can be made in hours.
Public Holiday Included: Determines whether public holidays are included in the time off calculation. (Unchecked in the image, meaning they are not included.)
Show On Dashboard: When checked, this time off type will be visible on the employee dashboard for quick access.
Allow To Attach Supporting Document: Allows employees to attach supporting documents (e.g., medical certificates) to their leave requests.
Kind of Time Off: Defines the type of leave (e.g., Absence as shown in the image).
Allow To Attach Supporting Document: Allows employees to attach supporting documents (e.g., medical certificates) to their leave requests.
Kind of Time Off: Defines the type of leave (e.g., Absence as shown in the image).
Negative Cap Section:
Allow Negative Cap: Allows employees to take more leave than they have accrued, going into a negative balance.
Display Option Section:
15. Color: This option allows you to assign a specific color to this time off type, which can help differentiate it visually in the calendar and dashboards.
Allocating leaves in Odoo involves setting a specific number of time off days or hours that employees can use within a certain period. This process helps manage leave policies effectively, ensuring that employees request time off only within their allocated balance and promoting fairness and transparency.
To allocate leaves, create a new allocation request from the "Allocations" menu by clicking the "Create" button, or open an existing request to make adjustments. This straightforward approach simplifies leave management, allowing for efficient tracking and compliance with organizational policies.
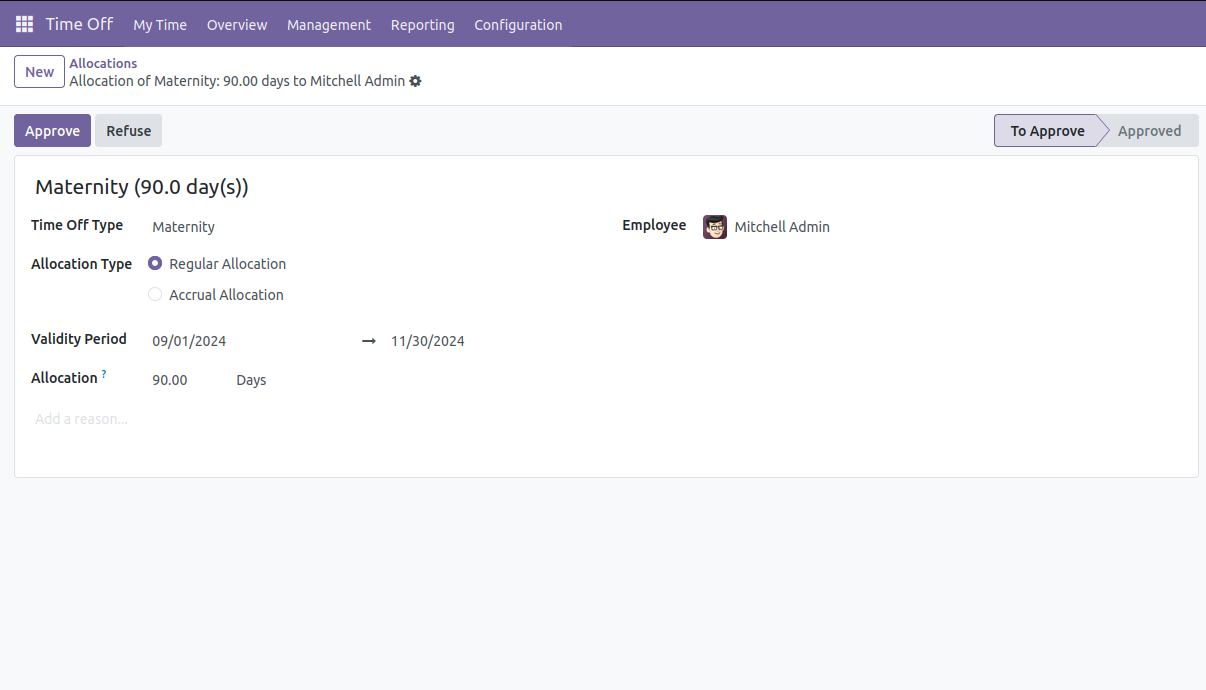
Header Section:Specifies the name for time off being allocated.
Time Off Type: Specifies the category of time off being allocated, such as vacation, sick leave, or personal time off.
Employee Name: Shows the name of the employee for whom the allocation is being made.
Allocation Type: Two options are available:
Regular Allocation
Accrual Allocation
Validity Period: Specifies the start and end dates for the allocation.
Allocation: Represents the total number of days allocated to the employee for the specified time off type.
Reason: A field for the user to provide an explanation or justification for the allocation.


0